
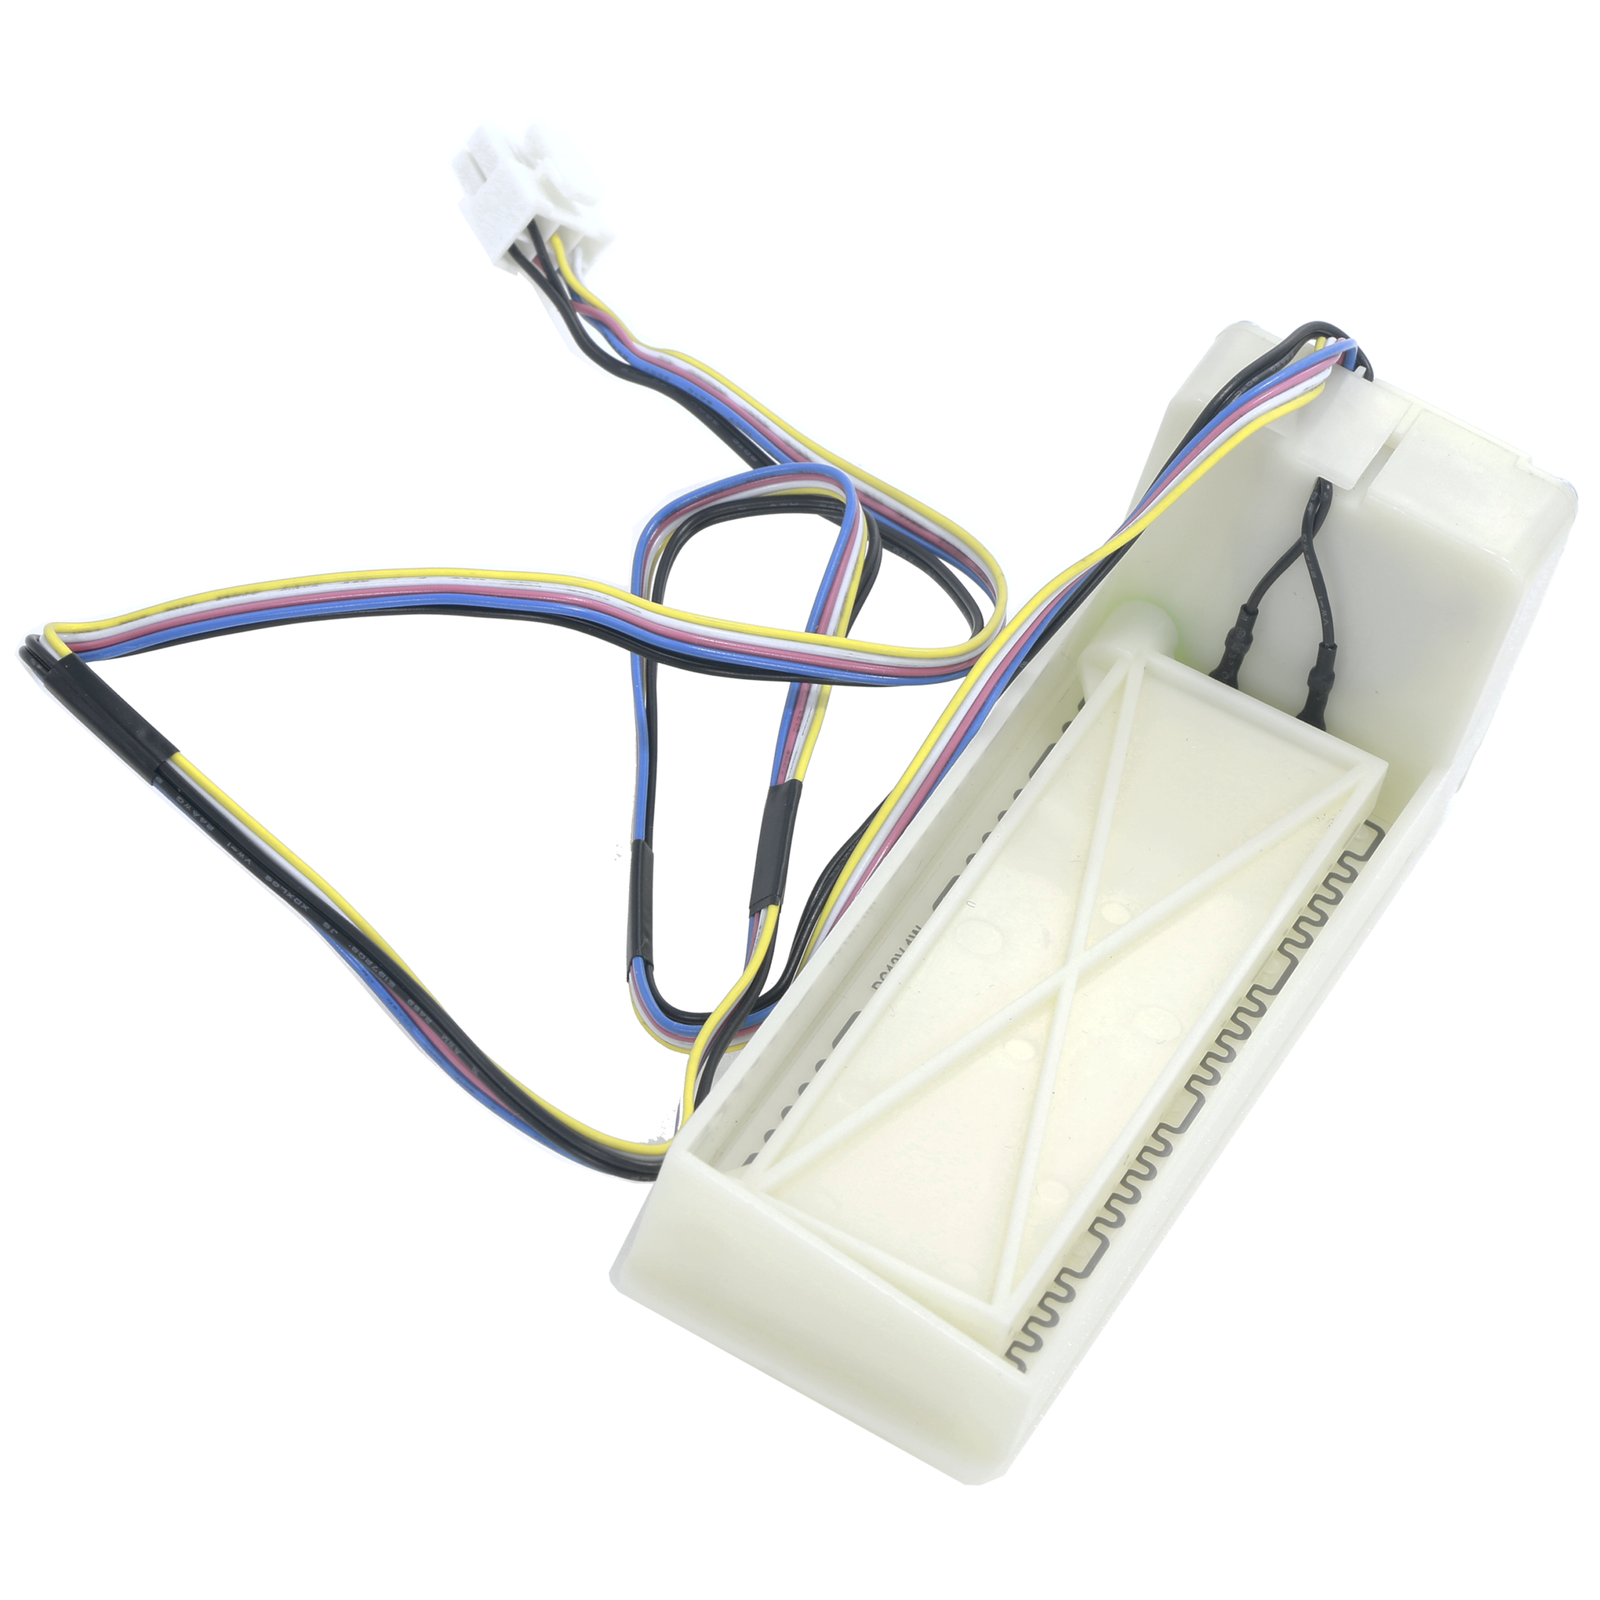
If your Whirlpool or KitchenAid refrigerator is not cooling in the fresh food section while the freezer still works, the problem is usually an airflow fault rather than a failed compressor. One of the most common causes is the air damper control assembly, part W11663222, which regulates how much freezer air is pushed into the refrigerator compartment. This guide walks through the diagnosis in order, so you replace the right part the first time instead of guessing.
Recommended Parts
Quick Diagnosis
- Fresh food section stays above 40°F while the freezer holds normal temperature.
- Or the opposite: produce freezes near the vent because the damper is stuck open.
- The damper housing is visibly iced over, cracked, or will not move by hand.
- Both compartments warm at once → this is not a damper fault, test the compressor and inverter board instead.
Tools and Safety
- Unplug the refrigerator before removing any interior panel.
- Phillips screwdriver, small flat screwdriver, and a putty knife for trim clips.
- Multimeter for the thermistor and voltage checks.
- Phone camera — photograph the harness routing before you disconnect anything.
Step 1: Confirm Which Compartment Is Actually Faulty
The damper only controls air moving from the freezer into the fresh food section. That single fact eliminates most wrong guesses, because the symptom pattern tells you whether the damper is even a candidate:
| What you observe | Most likely cause | Is the damper a suspect? |
|---|---|---|
| Fresh food warm, freezer normal | Air damper stuck closed, blocked return duct, or evaporator fan | Yes — test first |
| Crisper and shelves near the vent freeze | Air damper stuck open | Yes — test first |
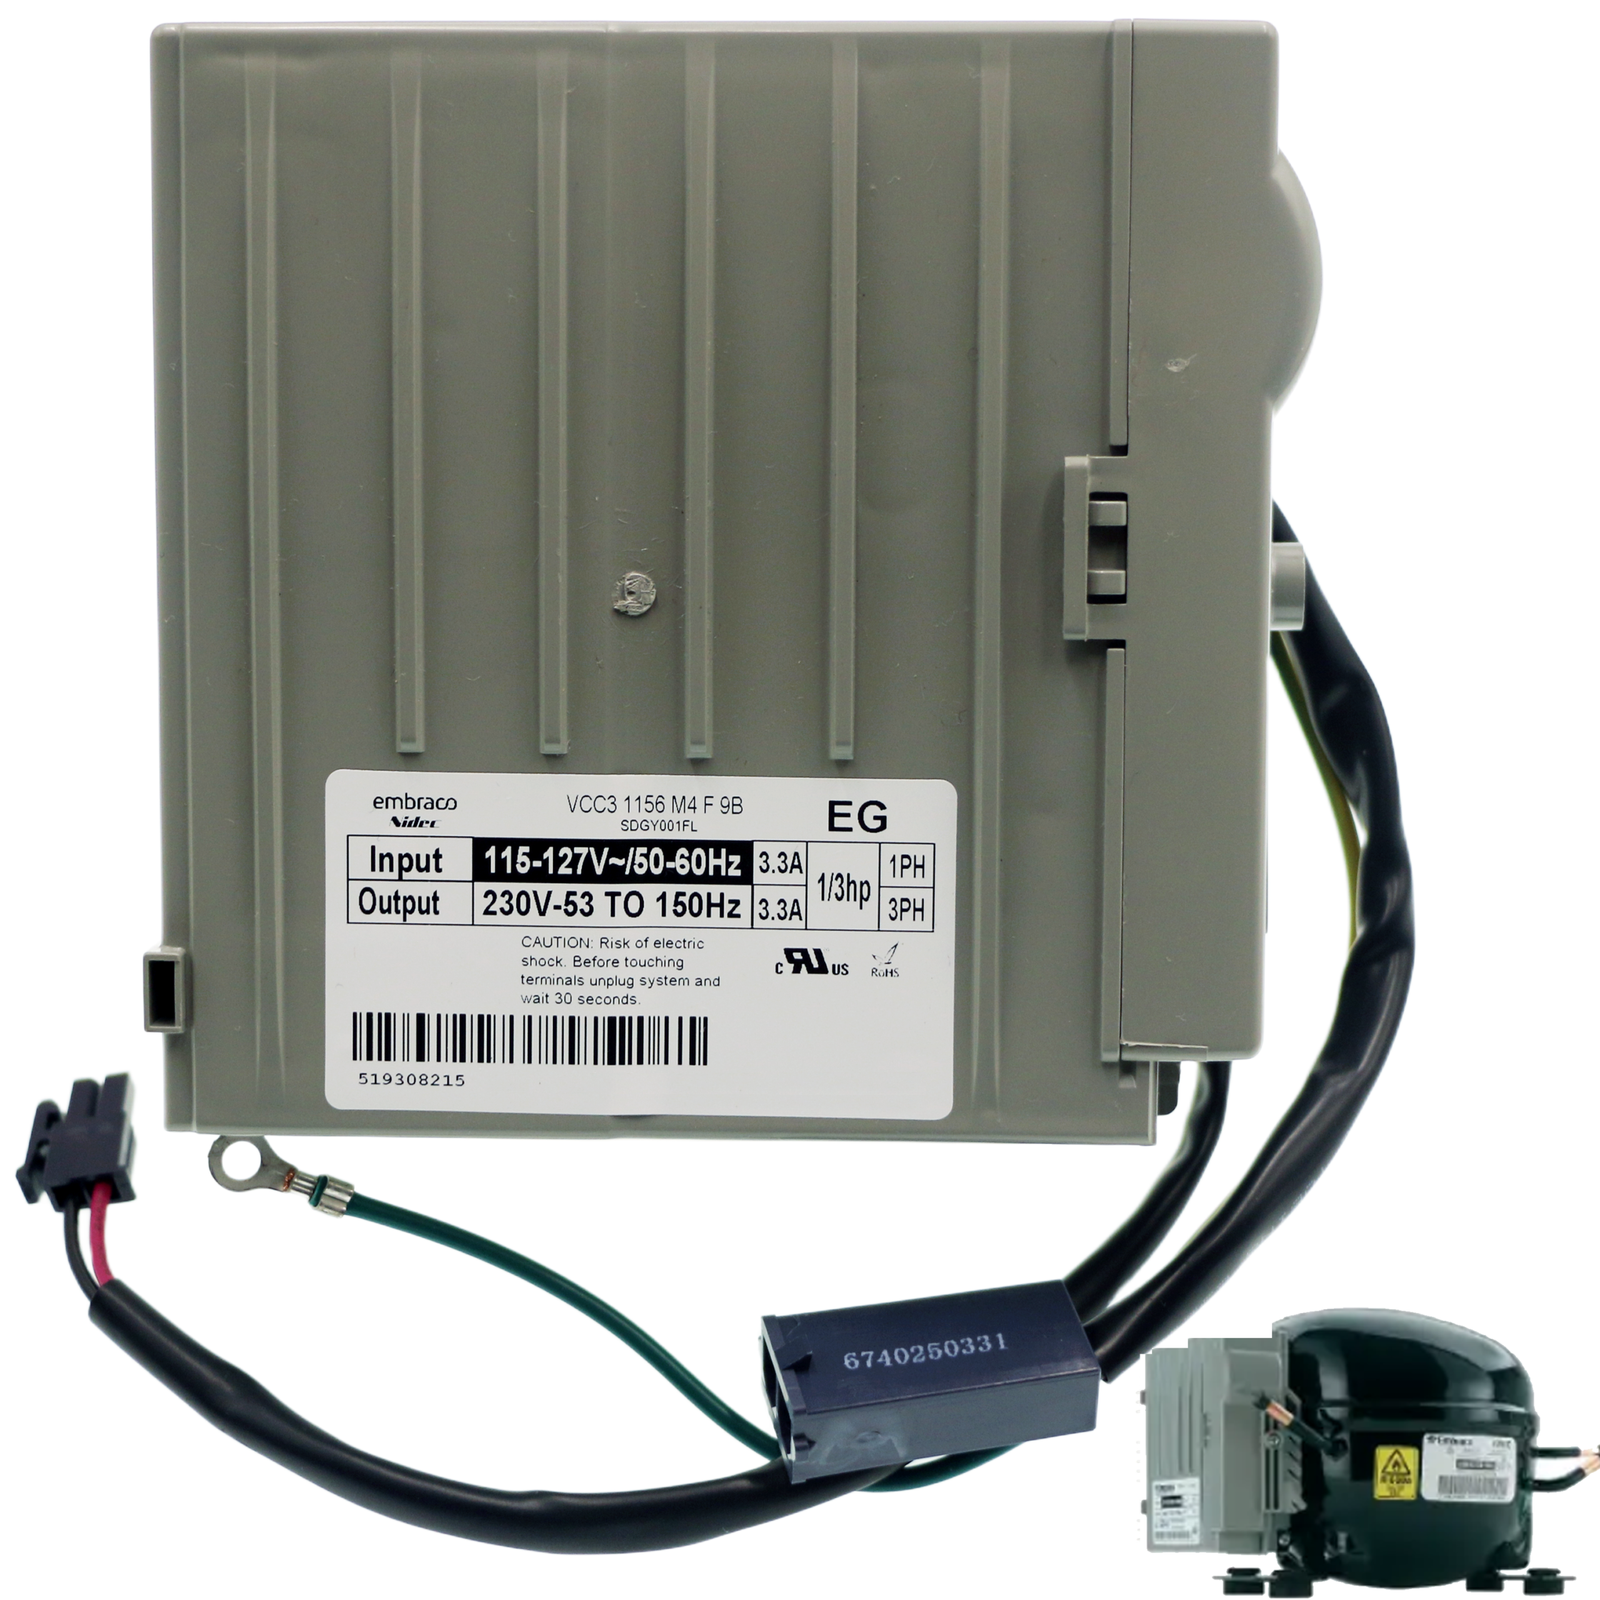
| Both compartments warm, compressor silent | Inverter control board, start relay, or compressor | No |
| Both compartments warm, compressor running continuously | Sealed system leak, dirty condenser coils, condenser fan | No |
| Temperatures swing up and down in both sections | Thermistor out of range or main control board | Usually not |
Step 2: Rule Out the Two Easy Lookalikes
- Check the evaporator fan. Open the freezer and listen. If the fan is not running, air never reaches the damper in the first place and the damper will test fine. A fan that is iced solid needs a defrost check, not a new damper.
- Check the return air path. Look for frost or a blocked return duct between the two compartments. Packed-in food against the return vent causes exactly the same warm-refrigerator symptom.
Step 3: Test the Air Damper
- Disconnect power and remove the panel covering the damper. On most Whirlpool and KitchenAid models it sits behind the evaporator cover in the freezer, or behind a trim panel in the fresh food section. Check the parts diagram for your model before removing screws.
- Try to move the flap by hand. It should move smoothly against spring tension. A flap that is frozen, gritty, or jammed in one position is a failed assembly regardless of what the motor does.
- Watch it during a cooling cycle. Reconnect power, hold the door switch closed, and observe the damper while the compressor runs. A working damper opens and closes as the control board calls for cold air. No movement at all points to the damper motor, the harness, or the board.
- Check for voltage at the damper connector. If the board supplies voltage and the damper still does not move, the assembly has failed. If there is no voltage, work backwards to the main board before ordering a damper.
- Inspect the housing for ice. A damper that ices over repeatedly usually means a defrost problem or a door seal letting humid air in. Replacing the damper alone will not fix that.
Step 4: Replace the Damper
- Unplug the refrigerator and empty the shelves nearest the damper.
- Release the retaining clips or screws and slide the assembly out.
- Disconnect the wire harness, using your photo to confirm the routing.
- Seat the new W11663222 assembly in the same bracket and reconnect the harness until it clicks.
- Reinstall the cover, restore power, and let the unit run for several hours before judging the temperature.
Part Numbers and Cross Reference
| Part | Function | Typical Symptom |
|---|---|---|
| W11663222 | Air damper control assembly | Warm fresh food compartment or freezing crisper |
| VCC3 1156 M4 F 9B | Inverter control board | Compressor will not start, both sections warm |
Always confirm fitment against your full model number before ordering.
Compatibility
The W11663222 air damper is used on Whirlpool and KitchenAid French door and counter-depth refrigerators, including the WRFF3136, WRFF3336, WRFF3536 and WRFF3736 series. The same damper design also appears on several four-door models. Match your model plate and compare the connector shape with your original part to confirm before you buy.
Frequently Asked Questions
Can a bad air damper stop a refrigerator from cooling entirely?
No. A failed damper mainly makes the fresh food section too warm or too cold while the freezer keeps working. If both compartments are warm, the damper is not the cause — check the compressor, inverter board and condenser fan instead.
How do I tell an air damper fault from a bad thermistor?
A damper fault usually produces an uneven result: one compartment is wrong while the other is fine. A thermistor that drifts out of range typically makes temperatures swing in both compartments and often sets a temperature-related error code.
Should I replace the damper or the control board first?
Test the damper first. If the flap is jammed or iced, or the assembly gets voltage and does not move, replace the damper. Only suspect the main board when the damper receives no voltage at all.
Why does my damper keep freezing over?
Repeated icing points to excess moisture, not a defective damper. Check the door gasket for gaps and confirm the defrost cycle is completing. Replacing the damper without fixing the moisture source will reproduce the fault.
How long does the replacement take?
Most DIYers finish in 30 to 45 minutes once the correct panel is removed. The job is unplugging the unit, opening one panel, swapping the assembly and reconnecting a single harness connector.